04. Working with Simply Linux in VirtualBox
Install Simply Linux
Tasks done in this seminar involve modification of the system configuration. Live CD does not allow this. So, you need to install Simply Linux on your disk.
Please follow these guidelines: ../03_PreSystemBoot/SimplyLinuxInatallation
Temporaryly modify GRUB settings
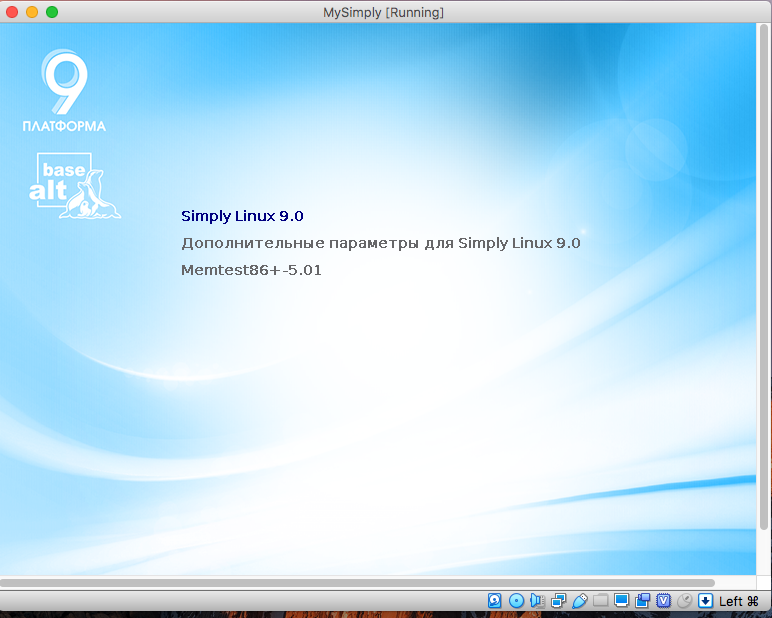
Start Simply Linux in VirtualBox.
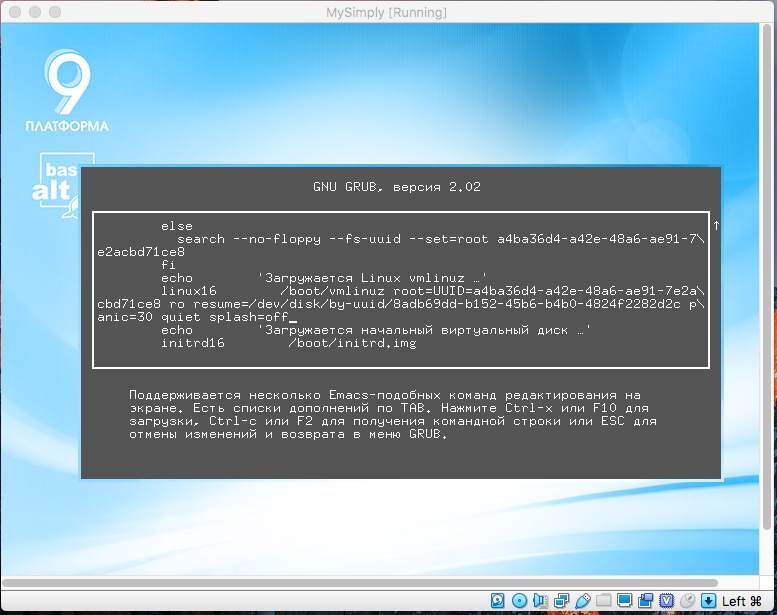
- Press key 'e' to edit GRUB settings.
- Replace 'splash' with 'splash=off'.
- Press key 'F10' to boot the system.


Now the splash screen will be not shown when the system is booting.
After logging in, see GRUB settings (config file is intact, kernel arguments are changed):
[andrewt@comp-core-i7-3615qm-0dbf32 ~]$ sudo cat /boot/grub/grub.cfg | grep splash
    linux16     /boot/vmlinuz root=UUID=a4ba36d4-a42e-48a6-ae91-7e2acbd71ce8 ro
            resume=/dev/disk/by-uuid/8adb69dd-b152-45b6-b4b0-4824f2282d2c panic=30 quiet splash
        linux16 /boot/vmlinuz root=UUID=a4ba36d4-a42e-48a6-ae91-7e2acbd71ce8 ro
            resume=/dev/disk/by-uuid/8adb69dd-b152-45b6-b4b0-4824f2282d2c panic=30 quiet splash
        linux16 /boot/vmlinuz-5.4.28-std-def-alt1 root=UUID=a4ba36d4-a42e-48a6-ae91-7e2acbd71ce8 ro
            resume=/dev/disk/by-uuid/8adb69dd-b152-45b6-b4b0-4824f2282d2c panic=30 quiet splash

[andrewt@comp-core-i7-3615qm-0dbf32 ~]$ cat /proc/cmdline
BOOT_IMAGE=/boot/vmlinuz root=UUID=a4ba36d4-a42e-48a6-ae91-7e2acbd71ce8 ro
resume=/dev/disk/by-uuid/8adb69dd-b152-45b6-b4b0-4824f2282d2c panic=30 quiet splash=off
Set up port forwarding
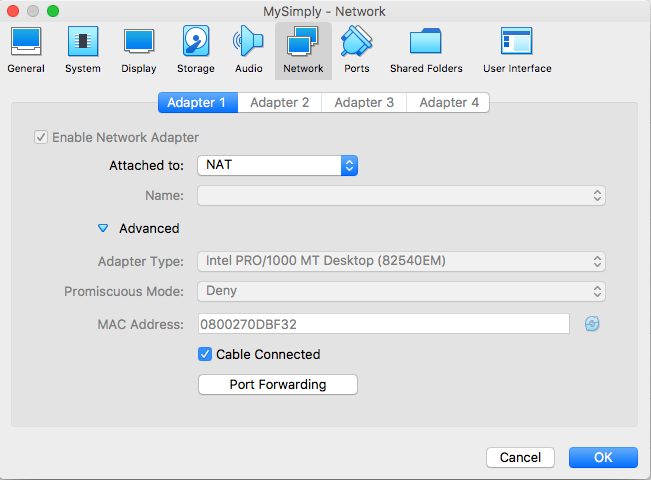
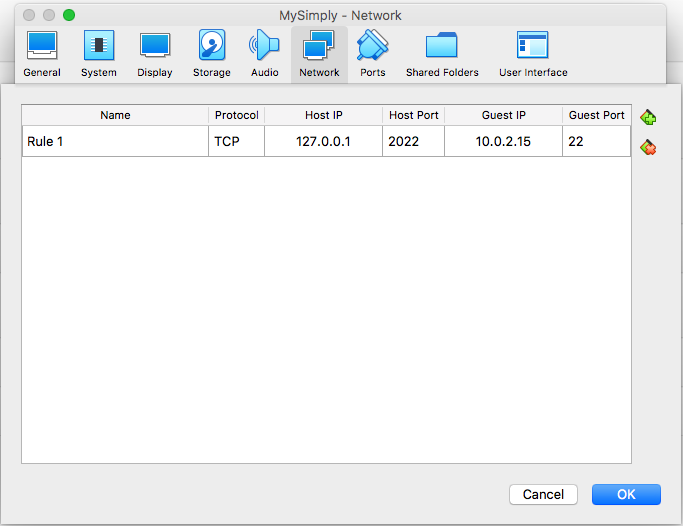
After Simply Linux is installed in your VirtualBox, please make that the network interface is enabled and set up port forwarding. We need to forwarding for port 22 in order to be able to connect to Simply Linux VM using SSH.


Run SSH service in Simply Linux
[andrewt@comp-core-i7-3615qm-0dbf32 ~]$ whoami
andrewt

[andrewt@comp-core-i7-3615qm-0dbf32 ~]$ su -
Password:

[root@comp-core-i7-3615qm-0dbf32 ~]# whoami
root
Check status of the sshd service:
[root@comp-core-i7-3615qm-0dbf32 ~]# systemctl status sshd
Start the service:
[root@comp-core-i7-3615qm-0dbf32 ~]# systemctl start sshd
Stop the service:
[root@comp-core-i7-3615qm-0dbf32 ~]# systemctl stop sshd
Enable the service by default:
[root@comp-core-i7-3615qm-0dbf32 ~]# systemctl enable sshd
Connect to Simply Linux using SSH
Do not forget to start sshd again ![]()
Do this on your host machine:
$ ssh andrewt@localhost -p2022
Create a new user
Get current user information:
[andrewt@comp-core-i7-3615qm-0dbf32 ~]$ whoami
andrewt

[andrewt@comp-core-i7-3615qm-0dbf32 ~]$ id
uid=500(andrewt) gid=500(andrewt) группы=500(andrewt),10(wheel),14(uucp),19(proc),22(cdrom),
71(floppy),80(cdwriter),81(audio),83(radio),457(vboxusers),458(sambashare),463(camera),
471(video),498(xgrp),499(scanner)

[andrewt@comp-core-i7-3615qm-0dbf32 ~]$ echo $PATH
/home/andrewt/bin:/bin:/usr/bin:/usr/local/bin:/usr/games
Switch to super user and see user information:
[andrewt@comp-core-i7-3615qm-0dbf32 ~]$ su -
Password:

[root@comp-core-i7-3615qm-0dbf32 ~]# whoami
root

[root@comp-core-i7-3615qm-0dbf32 ~]# id
uid=0(root) gid=0(root) группы=0(root),1(bin),2(daemon),3(sys),4(adm),6(disk),10(wheel),19(proc)

[root@comp-core-i7-3615qm-0dbf32 ~]# echo $PATH
/root/bin:/sbin:/usr/sbin:/usr/local/sbin:/bin:/usr/bin:/usr/local/bin
Create a new user:
[root@comp-core-i7-3615qm-0dbf32 ~]# adduser -c "New User" newuser
[root@comp-core-i7-3615qm-0dbf32 ~]#
Set password for the new user:
[root@comp-core-i7-3615qm-0dbf32 ~]# passwd newuser
passwd: updating all authentication tokens for user newuser.

You can now choose the new password or passphrase.

A valid password should be a mix of upper and lower case letters,
digits, and other characters.  You can use a password
that consists of 8 characters from at least 3 of these 4 classes, or

a password containing 7 characters from all the classes.
An upper case letter that begins the password and a
digit that ends it do not count towards the number of character
classes used.

A passphrase should be of at least 3 words, 11 to 40 characters
long, and contain enough different characters.

Alternatively, if no one else can see your terminal now, you can
pick this as your password: "Molten_chose-macho".

Enter new password:
Re-type new password:
passwd: all authentication tokens updated successfully.
[root@comp-core-i7-3615qm-0dbf32 ~]#
See information about the new user:
[root@comp-core-i7-3615qm-0dbf32 ~]# grep newuser /etc/passwd
newuser:x:501:501:New User:/home/newuser:/bin/bash

[root@comp-core-i7-3615qm-0dbf32 ~]# id newuser
...
Switch to the new user:
[root@comp-core-i7-3615qm-0dbf32 ~]# su - newuser
[newuser@comp-core-i7-3615qm-0dbf32 ~]$

[newuser@comp-core-i7-3615qm-0dbf32 ~]$ id
uid=501(newuser) gid=501(newuser) groups=501(newuser)
Try to switch to root:
[newuser@comp-core-i7-3615qm-0dbf32 ~]$ su -
-bash: /bin/su: Отказано в доступе

[newuser@comp-core-i7-3615qm-0dbf32 ~]$ ls -l /bin/su
-rws--x--- 1 root wheel 27520 янв 16  2017 /bin/su
 Why su wasn't working?
Log to root using a new terminal and give 'newuser' rights (add to group):
[root@comp-core-i7-3615qm-0dbf32 ~]# usermod -a -G wheel newuser

[root@comp-core-i7-3615qm-0dbf32 ~]# su - newuser

[newuser@comp-core-i7-3615qm-0dbf32 ~]$ id
uid=501(newuser) gid=501(newuser) группы=501(newuser),10(wheel)

[newuser@comp-core-i7-3615qm-0dbf32 ~]$ grep newuser /etc/group
wheel:x:10:root,andrewt,newuser
newuser:x:501:
Switch back to previous user can be done by exiting current shell with Ctr+D or exit command
[newuser@comp-core-i7-3615qm-0dbf32 ~]$ exit

[root@comp-core-i7-3615qm-0dbf32 ~]# exit

[andrewt@comp-core-i7-3615qm-0dbf32 ~]$
Now log off from this session and log in as newuser
Make sure the access is granted:
[newuser@comp-core-i7-3615qm-0dbf32 ~]$ su -
Password:
[root@comp-core-i7-3615qm-0dbf32 ~]#
H/W
Create 04_VirtualBox2 folder on sugon server. All files should reside there.
Save the contents of the /proc/cmdline file to the cmdline file
Save the output of the systemctl status sshd command to sshd-status file
Copy the /etc/group and /etc/passwd files
To copy files to a folder on a remote server, use the scp command:
$ scp /path/to/local/file username@hostname:/path/to/remote/file

$ scp username1@hostname1:/path/to/file username2@hostname2:/path/to/other/file
For example:
$ scp -P 2131 /etc/passwd andrey@sugon:/home/andrey/04_VirtualBox2/
